Thursday, February 28, 2013

Get Organized {the perfect container}

I wish I would have bought new plastic containers a long time ago instead of over 2 years into my clean eating journey. Oh well, live and learn. It was always so stressful dealing with odd shaped containers, not being able to find the perfect lid, or seeing what was inside the plastic container easily. Having coordinating containers (I love the design of them too) has made my life so much easier. Seriously. It's the little things in life that make the greatest impact sometimes.


 I'm here to tell you, if you can afford them, buy them now I bought the OXO brand at Target like this : Locktop Container 

I still plan to buy a few more, but I am trying to figure out what additional sizes I would use most. Not to mention it gets pricey, but I don't want to wait too long and they decide to discontinue the ones I decided to get (that would be my luck)!

Before just running out to purchase new ones you should actually spend some time thinking about what you need.

Features to consider:

Leakproof, airtight lids
BPA free
Clear container to view contents from all angles (even the top)
Freezer safe
Microwave safe
Dishwasher safe
Nesting containers to optimize space
Variety of sizes

I'm very happy with the brand and style I selected.

Here's a look inside my fridge. It's not always this organized, but I strive to keep it this way. It makes selecting and organizing leftovers and prepped food so much easier.


Eating clean involves a lot of prepping and planning. Planning to have leftovers for lunches or another night of the week. Prepping fruit and veggies ahead of time so they are easily accessible.  Not wasting food. Not letting food spoil. I love my new containers. They make it so easy to see what's inside. I found the PERFECT containers for my life. Life is good!


Wednesday, February 27, 2013

{clean} Pumpkin Chocolate Chip Muffins

I decided to make pumpkin chocolate chip muffins when a recipe came across my Facebook news feed that intrigued me.  Of course I thought it would be as simple as to copy the recipe, but that wasn't the case.  I ended up changing it quite a bit to fit my lifestyle and pack in more nutrition. I'm always looking for ways to do just that!

These are rather dense muffins.  They are packed full of nutrients. There is NO added processed sugar. Pitted dates, honey and apple puree are used to sweeten the muffins. These muffins are a fantastic source of protein and fiber. 

I think it's awesome my 4 year old son helped me make these muffins. He didn't flinch once when we added all these {unique} ingredients. He even helped me count out the dates and stir in the "black stuff" (chia seeds). He's so proud of himself that he can help mommy now!


I will say, if you are still addicted to processed sugar these 
may not be for you...yet! 


Or, maybe that picture changed your mind...

{clean} Pumpkin Chocolate Chip Muffins

Ingredients:
  • 2 cups oat flour
  • 1/2 cup ground golden flaxseed
  • 3 Tbps chia seeds (optional)
  • 2 tsp baking soda
  • 2 tsp cinnamon
  • 1 tsp nutmeg
  • 1/4 tsp cloves
  • 1/4 tsp ground ginger
  • 1 tsp salt
  • 1 tsp pure vanilla extract
  • 1 15 oz. can {all natural} pumpkin 
  • 1/4 cup Organic Extra Virgin Coconut oil (I recommend, Barlean's), liquefied
  • 1 cup {all natural/no sugar added} apple sauce or homemade puree
  • 12 pitted dates
  • 3 eggs
  • 2 oz dark chocolate chips (70% or greater is best) or you can use Dairy Free Enjoy Life mini chips.

Directions:

1) Add all dry ingredients to a bowl and stir. Flour, flax, chia seeds, baking soda, cinnamon, nutmeg, cloves, ginger, and salt.
2) In a high speed blender add coconut oil, dates, apple sauce, vanilla and pumpkin and blended until smooth.
3) Add eggs. Blend again on low until incorporated.
4) Add wet to dry and mix well. Fold in chocolate chips.
5) Spray or coat muffin pan with EVOO or coconut oil.  Scoop equal amounts into muffin tins.
6) Bake at 350 degrees for 20-25 minutes. Let cool.

NOTES:  I made my oat flour out of rolled oats in the Vitamix. You could try a different flour of your choosing to fit your needs. Instead of using apple sauce, I cored a Gala apple and pulverized it in the Vitamix (leaving the skin on). It made approx. 1 cup. Also, I chop my dark chocolate chips to make it seem like more (they are quite large).

Roasted Broccoli with Israeli Couscous


Roasted broccoli adds such great depth of flavor to this dish. The fresh lemon zest and juice brighten the dish perfectly.  If you typically steam or eat your veggies raw you should try roasting them next time.  I love how differently the vegetable can taste depending on how it has been prepared.

I'm always looking for simple side dishes that reheat well for lunch the next day. This one does just that.  I use frozen broccoli from Costco because it is always on hand AND it tastes fantastic! That can't be said for all frozen broccoli so choose wisely.

Roasted Broccoli with Israeli Couscous


Ingredients:

  • Broccoli florets (approx 1 lb), fresh or frozen
  • 1 tsp sea salt
  • Pinch pepper
  • 8 cloves garlic, minced
  • 1-2 Tbps organic extra-virgin olive oil
  • Zest and juice of 2 lemons
  • 2 cups dry Israeli Couscous (prepared per package instructions in water)


Directions:

1) To cook the broccoli, preheat the oven to 400°F. Chop the broccoli florets into small pieces (or wait until you are done if using frozen). 

2) Add broccoli to baking sheet or baking dish, toss the broccoli with the salt, pepper, garlic and enough oil to coat. Make sure all broccoli is in a single layer. 

3)Roast the broccoli in the oven until tender, about 20 minutes, stirring after 10 minutes. Longer possibly if using frozen.

4) Take roasted broccoli and garlic and mix with cooked couscous. Also stir in lemon juice and zest.  

NOTE: Salt and Pepper to taste. 

Optional: Add in a small amount of high quality Parmesan Cheese or chopped/sliced almonds.


Sunday, February 24, 2013

{clean} Cilantro Lime Rice

I am always looking for cost effective ways to feed my family. Adding whole grain rice is a great way to do just that.   Whole grain rice is a great way to get protein and fiber in your diet without consuming meat.  Brown rice is a great source of energy too.

Here are even more reasons to add whole grain brown rice to your diet: 


{clean} Cilantro Lime Rice

Ingredients:
  • 2 cup whole grain brown rice
  • 1 cup fresh cilantro
  • 1/4 cup fresh lime juice
  • 2 Tbps extra virgin olive oil
  • 2 garlic clove 
  • 3 Tbps water

Directions:

1) Cook rice in rice cooker or as directed.
2) Meanwhile, in a blender, combine  cilantro, lime juice, oil, garlic, and 2 tablespoons water; blend until smooth. 
3) Stir into cooked rice, and fluff with a fork.

NOTE:  This would be great with black beans. And/or add fresh salsa and guacamole. Rice bowls!!! Want more lime flavor, add 1 tsp of lime zest.


Costco {clean} Finds: 2013 edition

Costco has many great bulk items that you should be buying.  With that being said, they have many bulk items you shouldn't be buying (crackers, pretzels, chips, juices, soda, etc)

Here are some items that I buy every 2-4 weeks at Costco. I am going to focus on getting more chia and hemp seeds in my diet. With that being said, I am not sure how long these big bags will last. The flax gets used a LOT!


Flax, Chia, and Hemp Seeds
(These are superfoods and should be worked into your diet. I store my flax and hemp in the fridge)


{raw} Walnuts, Pecans, and Almonds
(Make sure there are NO added oils in your nuts you are buying.)


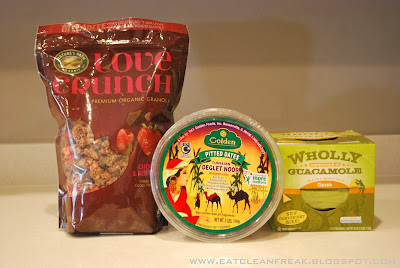
Granola, Pitted dates, and Guacamole
(The LOVE CRUNCH is not something I buy regularly (they were demoing it), but it was a special treat for the kids to have.  There is only 1/4 cup per serving so that isn't much. They will eat this in moderation. It's GOOD!)


{frozen} Broccoli Florets, White Sweet Corn, 
and Green Beans
(These are all fantastic. We use them often. The broccoli comes in 4 individual bags and taste very fresh. We steam the broccoli and corn with a dash of sea salt. That's it. The green beans are great with garlic too.)


{frozen} Sweet Pineapple and Wild Blueberries
(These are awesome! My kids even love to eat them both frozen too)


 Mario Batali Marinara


 Parkers Farm Peanut Butter
(We LOVE this, even my picky 4 year old)


Wild Pacific Mahi-Mahi

(This is SO good. If you don't like fish, give it a try!)


 Grass-fed butter and Cheese


 Applesauce Pouches


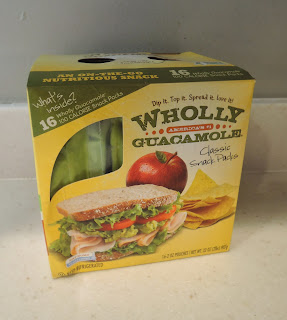
Snack size Guacamole

100% Pure Maple Syrup and 
Organic Strawberry Spread

Organic Brown Rice

Wednesday, February 20, 2013

{clean} Wild Blueberry Freeze

In my house, we treat any signs of sickness with food. Yes, that's right, food.  When anyone comes down with the start of a common cold, we up the antioxidants...Big time! Not to mention the water or green tea.

If you haven't had wild blueberries you have been missing out!  We get the 4 pound bag of frozen wild blueberries at Costco and they are fantastic. They are delicious, but more importantly very high in antioxidants!

According to USDA studies, Wild Blueberries have the highest antioxidant capacity per serving, compared with more than 20 other fruits. Using the Oxygen Radical Absorbance Capacity (ORAC) testing procedure, researcher Ronald Prior, Ph.D., found that a one-cup serving of Wild Blueberries had more total antioxidant capacity (TAC) than a serving of cranberries, strawberries, plums, raspberries and even cultivated blueberries. Animal studies have show blueberries to improve motor skills and reverse short term memory loss. (source)

I know I tell you ALL THE TIME, but the Vitamix is the best kitchen appliance ever for clean eaters!  I own the 5200 series and we love it. I use it 2-3 times a day, if not more.  It turns frozen fruits into the creamiest texture in about 60 seconds.

My 4 year old son helped me come up with this recipe. It's simple and so yummy! He loves adding the frozen wild blueberries on top of the creamy goodness! This has NO added colors, sugars, or preservatives!

{clean} Wild Blueberry Freeze

Ingredients
  • 1 cup frozen wild blueberries
  • 1 frozen banana
  • 3 pitted dates
  • 1/4 cup unsweetened almond milk
Directions

Add all ingredients into a high speed blender, like the Vitamix, and blend until smooth. Approximately 60 seconds. Top with extra frozen berries if you wish.

NOTE: This makes one huge serving. You can double it easily and keep the same consistency. I wouldn't try making more than 2 servings at a time. Do not over blend or it will not be Gelato texture.

Wednesday, February 13, 2013

{clean} Valentine's ideas

I have never been big on commercialized Valentine's Day, such as store bought cards, candies, and flowers. It just seems a little silly to feel obligated to show your loved ones you love them with cheap candy!  There are so many other ways to show that you care without buying a single bag of candy or store bought card!

Last year I had the kids cut out heart shapes for daddy.  My daughter (the only one that could write at the time) wrote words on each heart as to why she loved him so much (I wrote a few myself). It was a huge hit and he had a great time (and a few laughs) reading them at dinner. A lot can change in a year, look closely..."loves Diet Coke". He no longer drinks it! YAY!


I may not love the commercial side of Valentine's Day but I LOVE my family and I'll do my part to make their day special.  It can sometimes be a little tricky with no added colors, chemicals, preservatives to make it fun and colorful, but I'm always up for a challenge for the sake of my family and remaining {clean}.

One year I put together a video card set to music and words with all the reasons why we love my husband. I should find that, because it was great!

Strawberry Lemonade
This was made with fresh strawberries, lemon juice, filtered water, and stevia.


 Strawberry/Banana Milkshake
Frozen strawberries, frozen bananas, unsweetened almond milk, and honey/agave to sweeten, if needed. You really can't screw this up. I usually do a cup of milk, a cup strawberries, and a cup of bananas. It's all about personal taste.

Heart Shaped Strawberries & Heart Picks
 I found extra large strawberries so I could actually cut out the hearts with a cutter. If you don't have this option you can easily make yours look like hearts. I did that last year. The picks I found at Party City for $1 on clearance for a dozen.

That's all for now, I will be posting more tomorrow...

Friday, February 8, 2013

Age is just a number {make it count}

I remember exactly how I felt 3 years ago when I was about to turn 35.  I remember dreading it. Dreading that I was about to enter into my mid-late 30s. I felt old. I felt out of shape. I thought turning 35 was the worst thing to happen. I could tell I was aging, and the appearance of more gray hair wasn't helping matters. I sure didn't carry around much thought about my health in a positive light.

Just when I was full blow into my fear of turning 35, my friend Megan's cancer returned.  She was told she was going to die.  She was a wife, friend, daughter, and mother to two very young daughters. 


Megan passed away April 24, 2010 at the age of 34. Megan never reached age 35. I will never forget some of the conversations we had those last few months of her life. This sorta thing changes a person. I had to decide how it was going to change me. And I did.


Turning 35 became the greatest blessing in the world to me. I was beyond grateful on April 16th when I could proudly say I turned 35. I was thankful. My family was thankful. I took the next couple of months to try to grasp what had happened, attend her funeral and mourn.  

By that July, I had decided to stop drinking Diet Coke. Period. I detoxed off caffeine and alcohol of any kind for 4 weeks plus. I got blood testing done. It was then I realized my cholesterol was elevated. I had been eating a low-fat diet rich in chemicals and had shown no signs of weight loss. I felt defeated AND empowered, all in the same moment. I knew I was still left on this Earth for a purpose. That day was a gift and from that moment on I made changes. Lots of changes. I promised myself I would  get educated on health and live life the best I knew how. 

 Two weeks prior to Megan's passing the foundation was founded: Megan S Ott Foundation. (Yes, she was THAT awesome to be dedicated to helping others, even knowing she was in her last weeks on this Earth.) 

I am on the board and each January I get together with her parents, her sister and other board members and we begin the process of prepping for an annual fundraiser in her honor in May. It's tough for me to let those emotions flood back in each January as I see her family, but Megan is worth it. Her death and battle is the reason I am where I am today. The foundation has touched so many people's lives that are battling Breast Cancer. We raised $84,000 last year at this one event. 

This time of year is full of emotions for me (and anxiety). We have the fundraiser. We have my birthday. We have the annual reminder of Megan's passing. We have the annual Breast Cancer Walk which I walk in honor of her.

In the midst of all of this,  I can only stay focused on the positive things in my life. The blessings of each new day. The choice to make better choices. The choice to help others. Eating clean isn't all about what you eat, it's about realizing that being healthy has many different levels. Mentally, physically, and  emotionally. 

As I reflect back lately on where I was in the months leading up to age 35, I often stop and count my blessings.  I wasn't in a good place back then. I am forever grateful to myself. I am forever grateful I knew I was worth it. I can now look back with no regrets. I feel confident in the direction my life is headed.  I feel younger. I feel full of life and passion. I feel empowered. I sure the heck don't feel like I am about to turn 38 (that's a fabulous feeling).

 I can't say I will never be sickened with cancer. BUT, I can say I am giving it my all to avoid it.  Giving it your all is really all you can do on this ride called LIFE!

Enjoy your day. It's a gift. I continue to live everyday the best I can. And the countdown is on until I turn 38! What a blessing that will be.


"....As I tell people, I'm dying.  I don't know if it is all the drugs they had me on, but I did not sugar coat this when I told people.  Well, that is still true, I am going to die, but until then I am living.  I'm not exactly sure how much time I have left, so I will just live everyday that I have as best I can."
 -Megan (March 21st, 2010)


Pink Slime {mechanically separated meat}

Stop buying anything with the words "mechanically separated" meat of any kind in the ingredients.  It's super nasty. It's terrible for you and your health. I'm not even mentioning the other ingredients that probably come along with eating such meat concoctions.  

I love this video from Jamie Oliver's Food Revolution. Watch all the way to the end. It's shocking that the kids still eat the nuggets.  


Read labels. Look for meats that have little ingredients. Ones you can pronounce and understand exactly the type of meat and parts you are eating. 
Educate your children on this matter. Educate your family. 

Thursday, February 7, 2013

Love yourself {you're the only YOU you got}


In this journey of {clean eating} you need to give yourself credit for every single right choice you make. You need to realize these things are HUGE! And they ALL add up quickly.

If you drank enough water, pat yourself on the back. If you remembered to drink green tea, pat yourself on the back.  If you read labels and made better choices, pat yourself on the back.  If you stopped consuming trans-fats, pat yourself on the back. If you didn't consume soda, pat yourself on the back!...Ok, you get my point!


Give yourself credit for these things, BECAUSE it's in these little things that you can truly experience what I am feeling after living {clean} for over 2 years: so much PRIDE AND SELF WORTH!  I have a new passion for life. I have a new thankfulness for life. I love my life.

Don't get discouraged. Stay the course. Remind yourself daily why you wanted to be healthier in the first place. Remind yourself that you are WORTH IT!. Days turn into weeks, into months, into years and you can sit back one day realizing you are where you always wanted to be. A healthier version of you.

Now, give yourself a pat on the back. It felt good, didn't it? 


Tuesday, February 5, 2013

Gluten-Free Millet Pancakes

This recipe comes from the new book, Clean Cuisine {an 8-week anti inflammatory nutrition program that will change the way you age, look, and feel}. I can't wait to start reading it and give you my review.  I know it's going to be awesome!

Until then....It's National Pancake Day!  I had to try the gluten free pancake recipe from the book right away. The book is full of recipes! We are always looking for ways to rid gluten from our lives. Why? I will get into that another day. Just trust me until then, gluten drags you down!

This recipe was a huge hit with my 4 year old taste tester. I will be making more for Brinner (breakfast for dinner) later today and testing it out on the whole family.  It's going to be our new go to pancake recipe. 

In the book it has the recipe spelled out for one serving. For my family we are always looking for ways to make extra to freeze or use later in the week. With that being said, I took the recipe and multiplied it by four. 

Gluten-Free Millet Pancakes
(Photo courtesy of Clean Cuisine)

Ingredients:
Serves 4
  • 1 1/4 cup water
  • 4 organic pastured eggs (I had to settle for organic)
  • 1/2 tsp pure vanilla extract
  • 1/2 cup hemp seeds (I used golden flaxseed)
  • 12 pitted dates
  • 1 1/4 cup millet flour
  • 2 tsp baking soda
  • 1/2 tsp baking powder
  • 1/8 tsp unrefined sea salt
  • 1/2 tsp cinnamon
  • organic extra-virgin coconut oil (such as Barlean's), for oiling the skillet
Directions:
1) In a high-speed blender, combine all of the ingredients except for the coconut oil and blend until smooth and creamy.
2) Lightly oil the bottom of a skillet over medium heat. Once the skillet is hot, pour a small amount of batter in the pan. Cook until bubbles form on the surface, then flip the pancakes, and continue to cook until golden, 1 to 2 minutes. Repeat until batter is gone.
3) Serve warm with fresh fruit.
NOTE: We love cinnamon! Next time I will be adding more to the recipe. Also, we have a large griddle that makes it super simple to make large batches!